Gating
Gating is a powerful way to explore and separate cell populations, but spillover and overlapping markers make it difficult to classify all cells accurately using gates alone. CellTune enhances this process with tools for cell sampling, review, landmark gating, and complex gate construction, allowing you to iteratively refine populations and build high-quality cell type definitions.
This documentation section introduces the Gating panel and explains its various functions, controls, and recommended workflows.
Also make sure to see our gating tutorials, which walk you through both basic and advanced gating techniques, showing how to use gating effectively as part of the broader CellTune workflow.
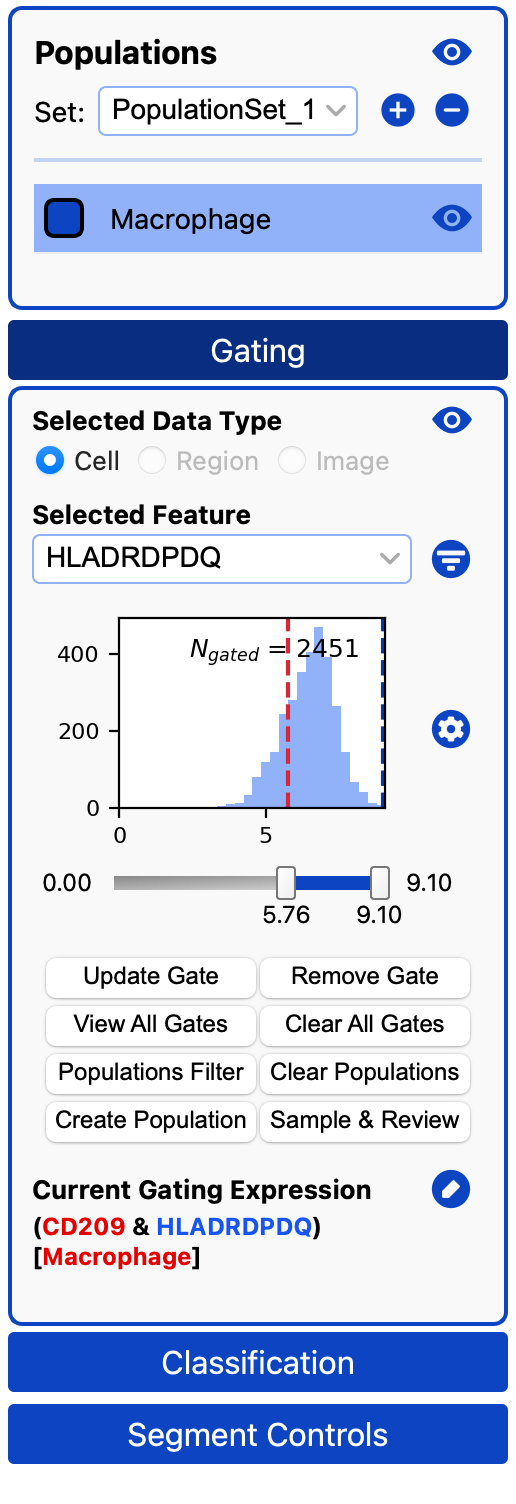
The Gating Panel
-
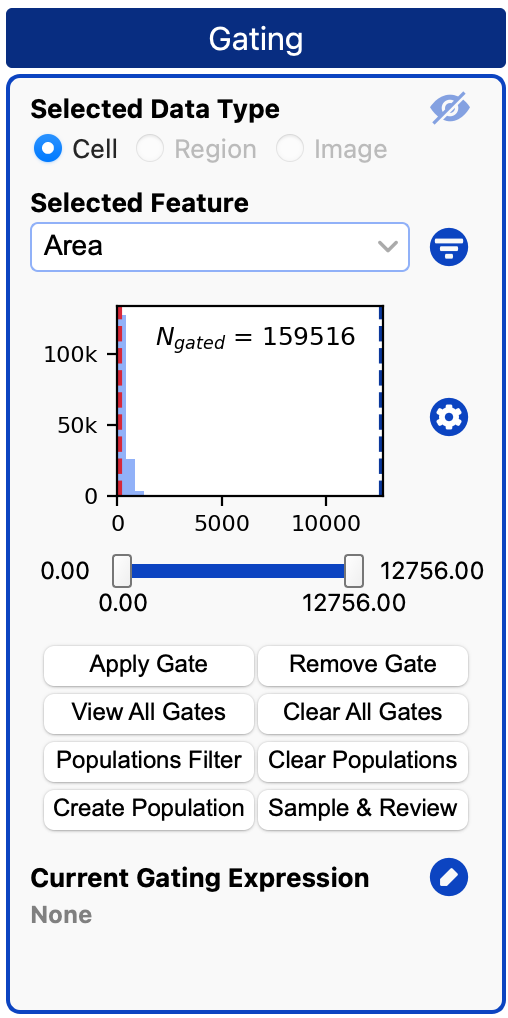
Select the data type. (Currently, only cell-level gating is supported.)
- Choose a feature to gate by.
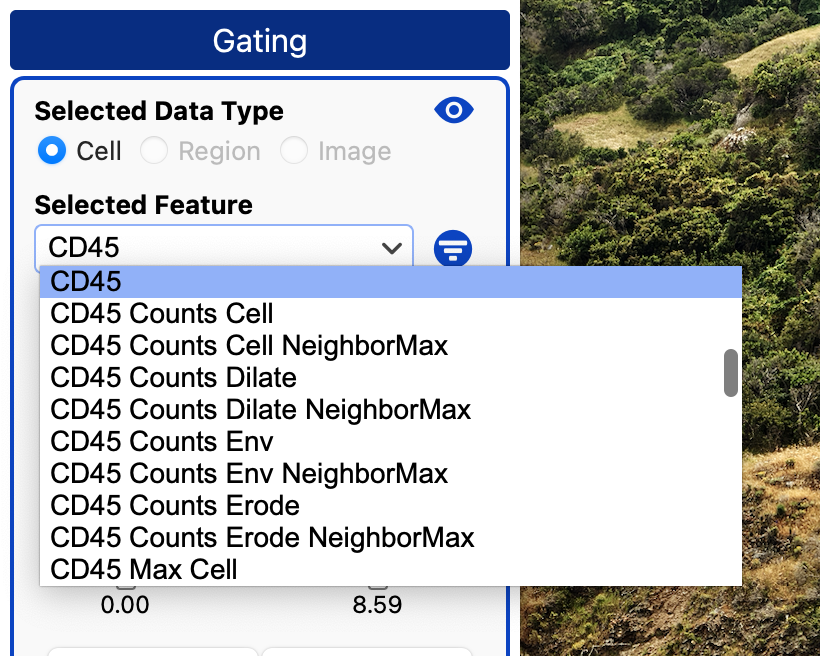
- Use the dropdown to select a feature.
- You can also type directly into the box and press Enter to select a feature.
-
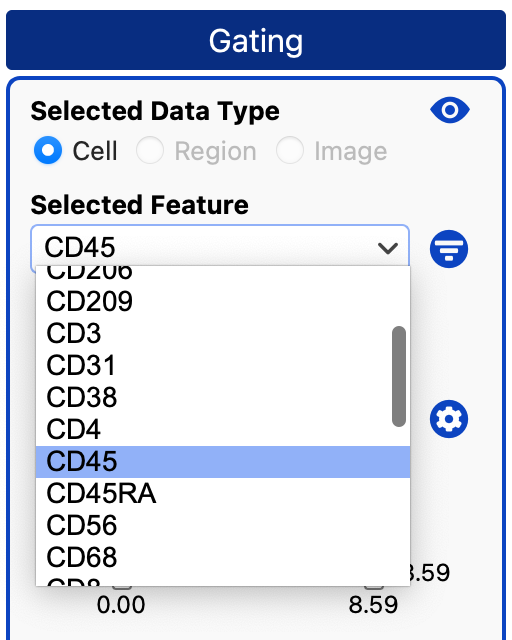
Click the filter icon to narrow the list so you aren’t overwhelmed by all spatial features.
Before filtering:
After filtering:
- View the histogram.
- Once a feature is selected, a histogram appears. Adjust the gate by dragging the sliders or by clicking the threshold values and editing them directly. The gated cells update instantly.
- Use the gated cells. When satisfied with your gate, you can:
Apply Gateto add additional gates on top of it.Create Populationfrom the gated cells.Sample & Reviewcells from the gate for landmarking or verification.
Buttons in the Gating Panel:
Apply Gate: Makes the current gate persistent and adds it to the gating expression; allows stacking multiple gates.Remove Gate: Removes the current gate.View All Gates: Opens a table showing all active gates and their thresholds.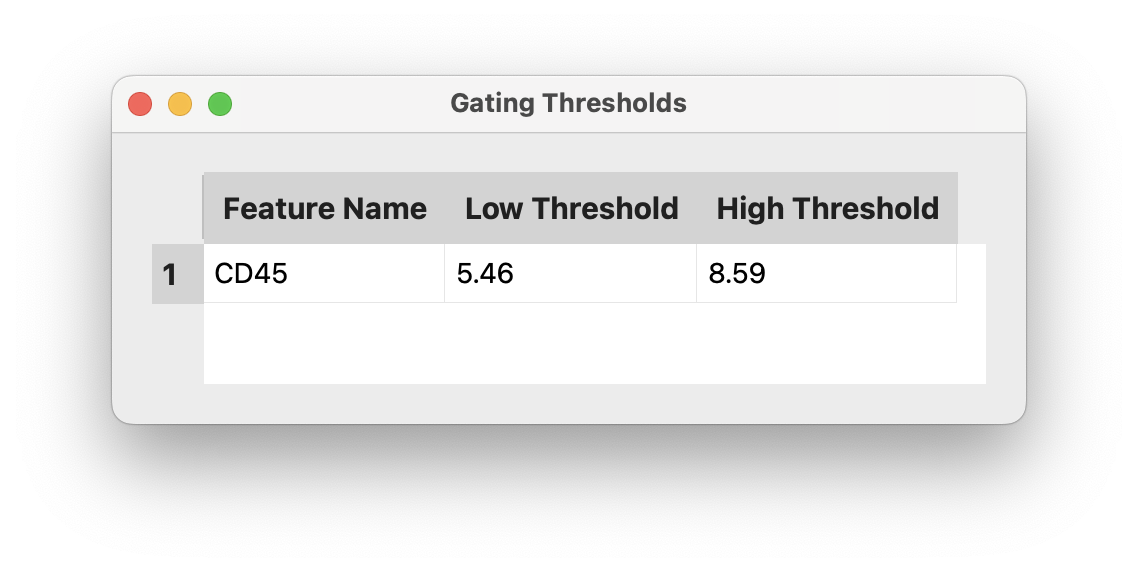
Clear All Gates: Removes every applied gate.Populations Filter: Applies gating only to the currently selected populations.Clear Populations: Removes the population filter.Create Population: Creates a new population from the currently gated cells.Sample & Review: Samples all the cells from the current gate and creates a review from them. (You should use randomization - see Review Documentation)
Gating Visibility & Opacity
At the top of the gating panel is a visibility icon to toggle on/off the gating outline/fill. If it is on it will still be visible when the gating panel is minimized.
You can adjust whether the gating color fills the selected cells or only shows their borders, as well as the gating opacity, from the Segment Controls panel.
Gating Histogram Plot Settings
To the right of the histogram there is a settings icon you can click on to edit the histogram settings  :
:
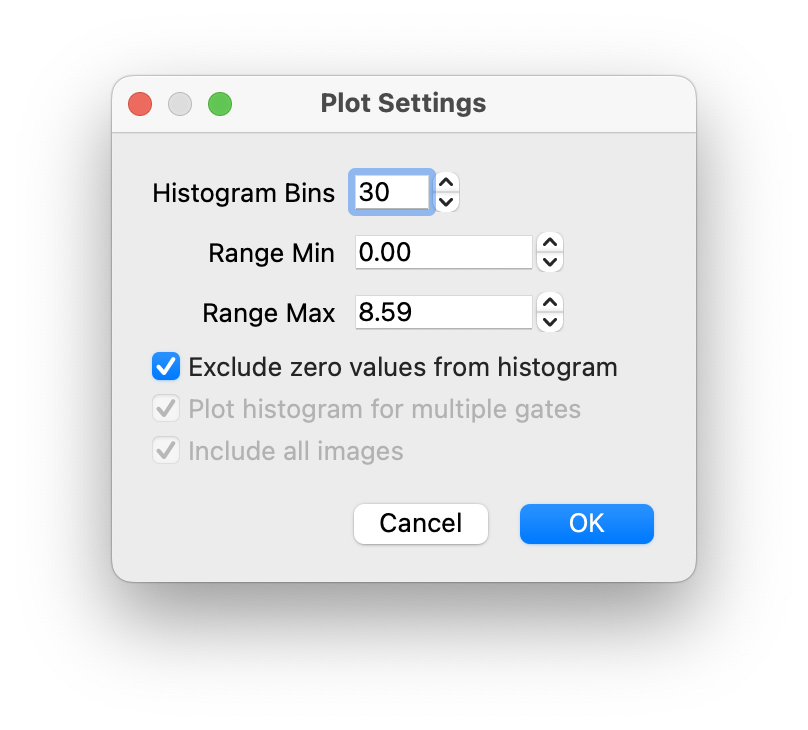
- Histogram Bins
- Min and Max of the range
- Whether to exclude zero values from the histogram (effectively min range 0.00001)
Standard vs. Landmark Gating
When we typically think of gating, we are trying to set thresholds to separate between positive and negative cells. The following example shows a threshold we might apply on CD45 to separate CD45+ and CD45- cells. [The cells highlighted in cyan would be gated as positive.]
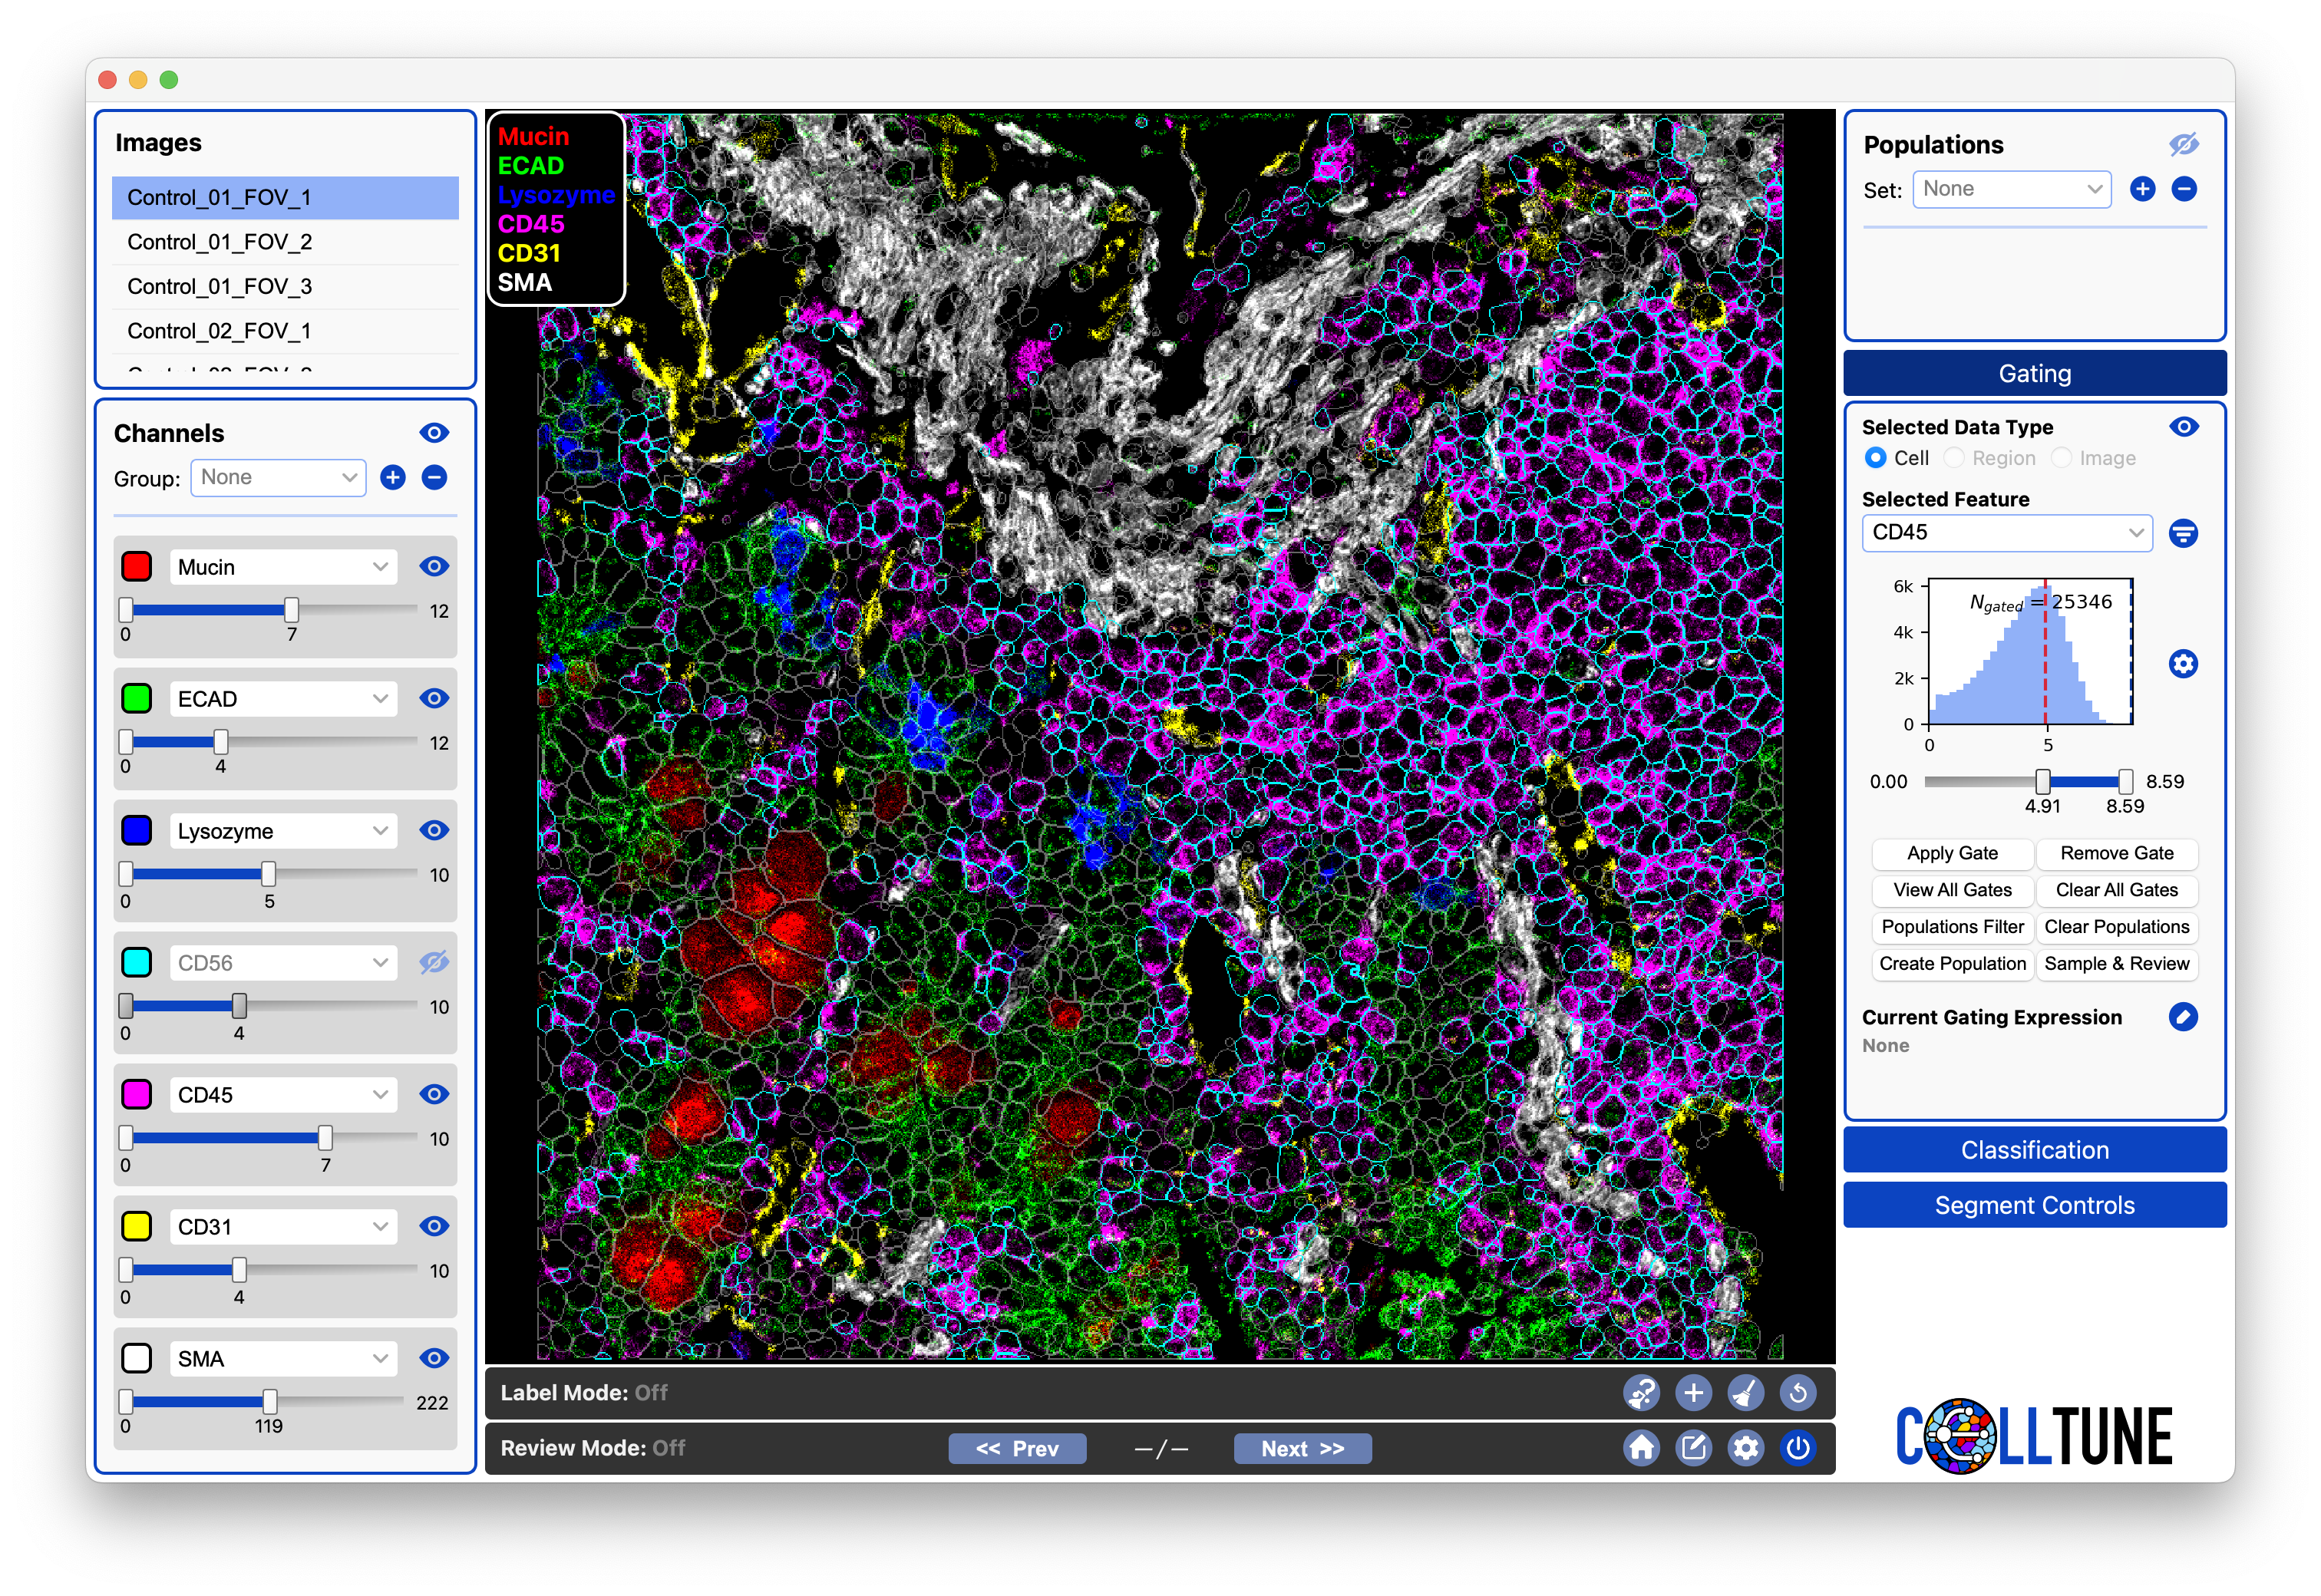
Notice where the threshold is on our histogram
For Landmark Gating, we only need to get a subset of highly confident positive cells. We want them to all be correct (not neighboring cells picking up spillover), therefore we set the gate very high, to only get highly expressing cells.
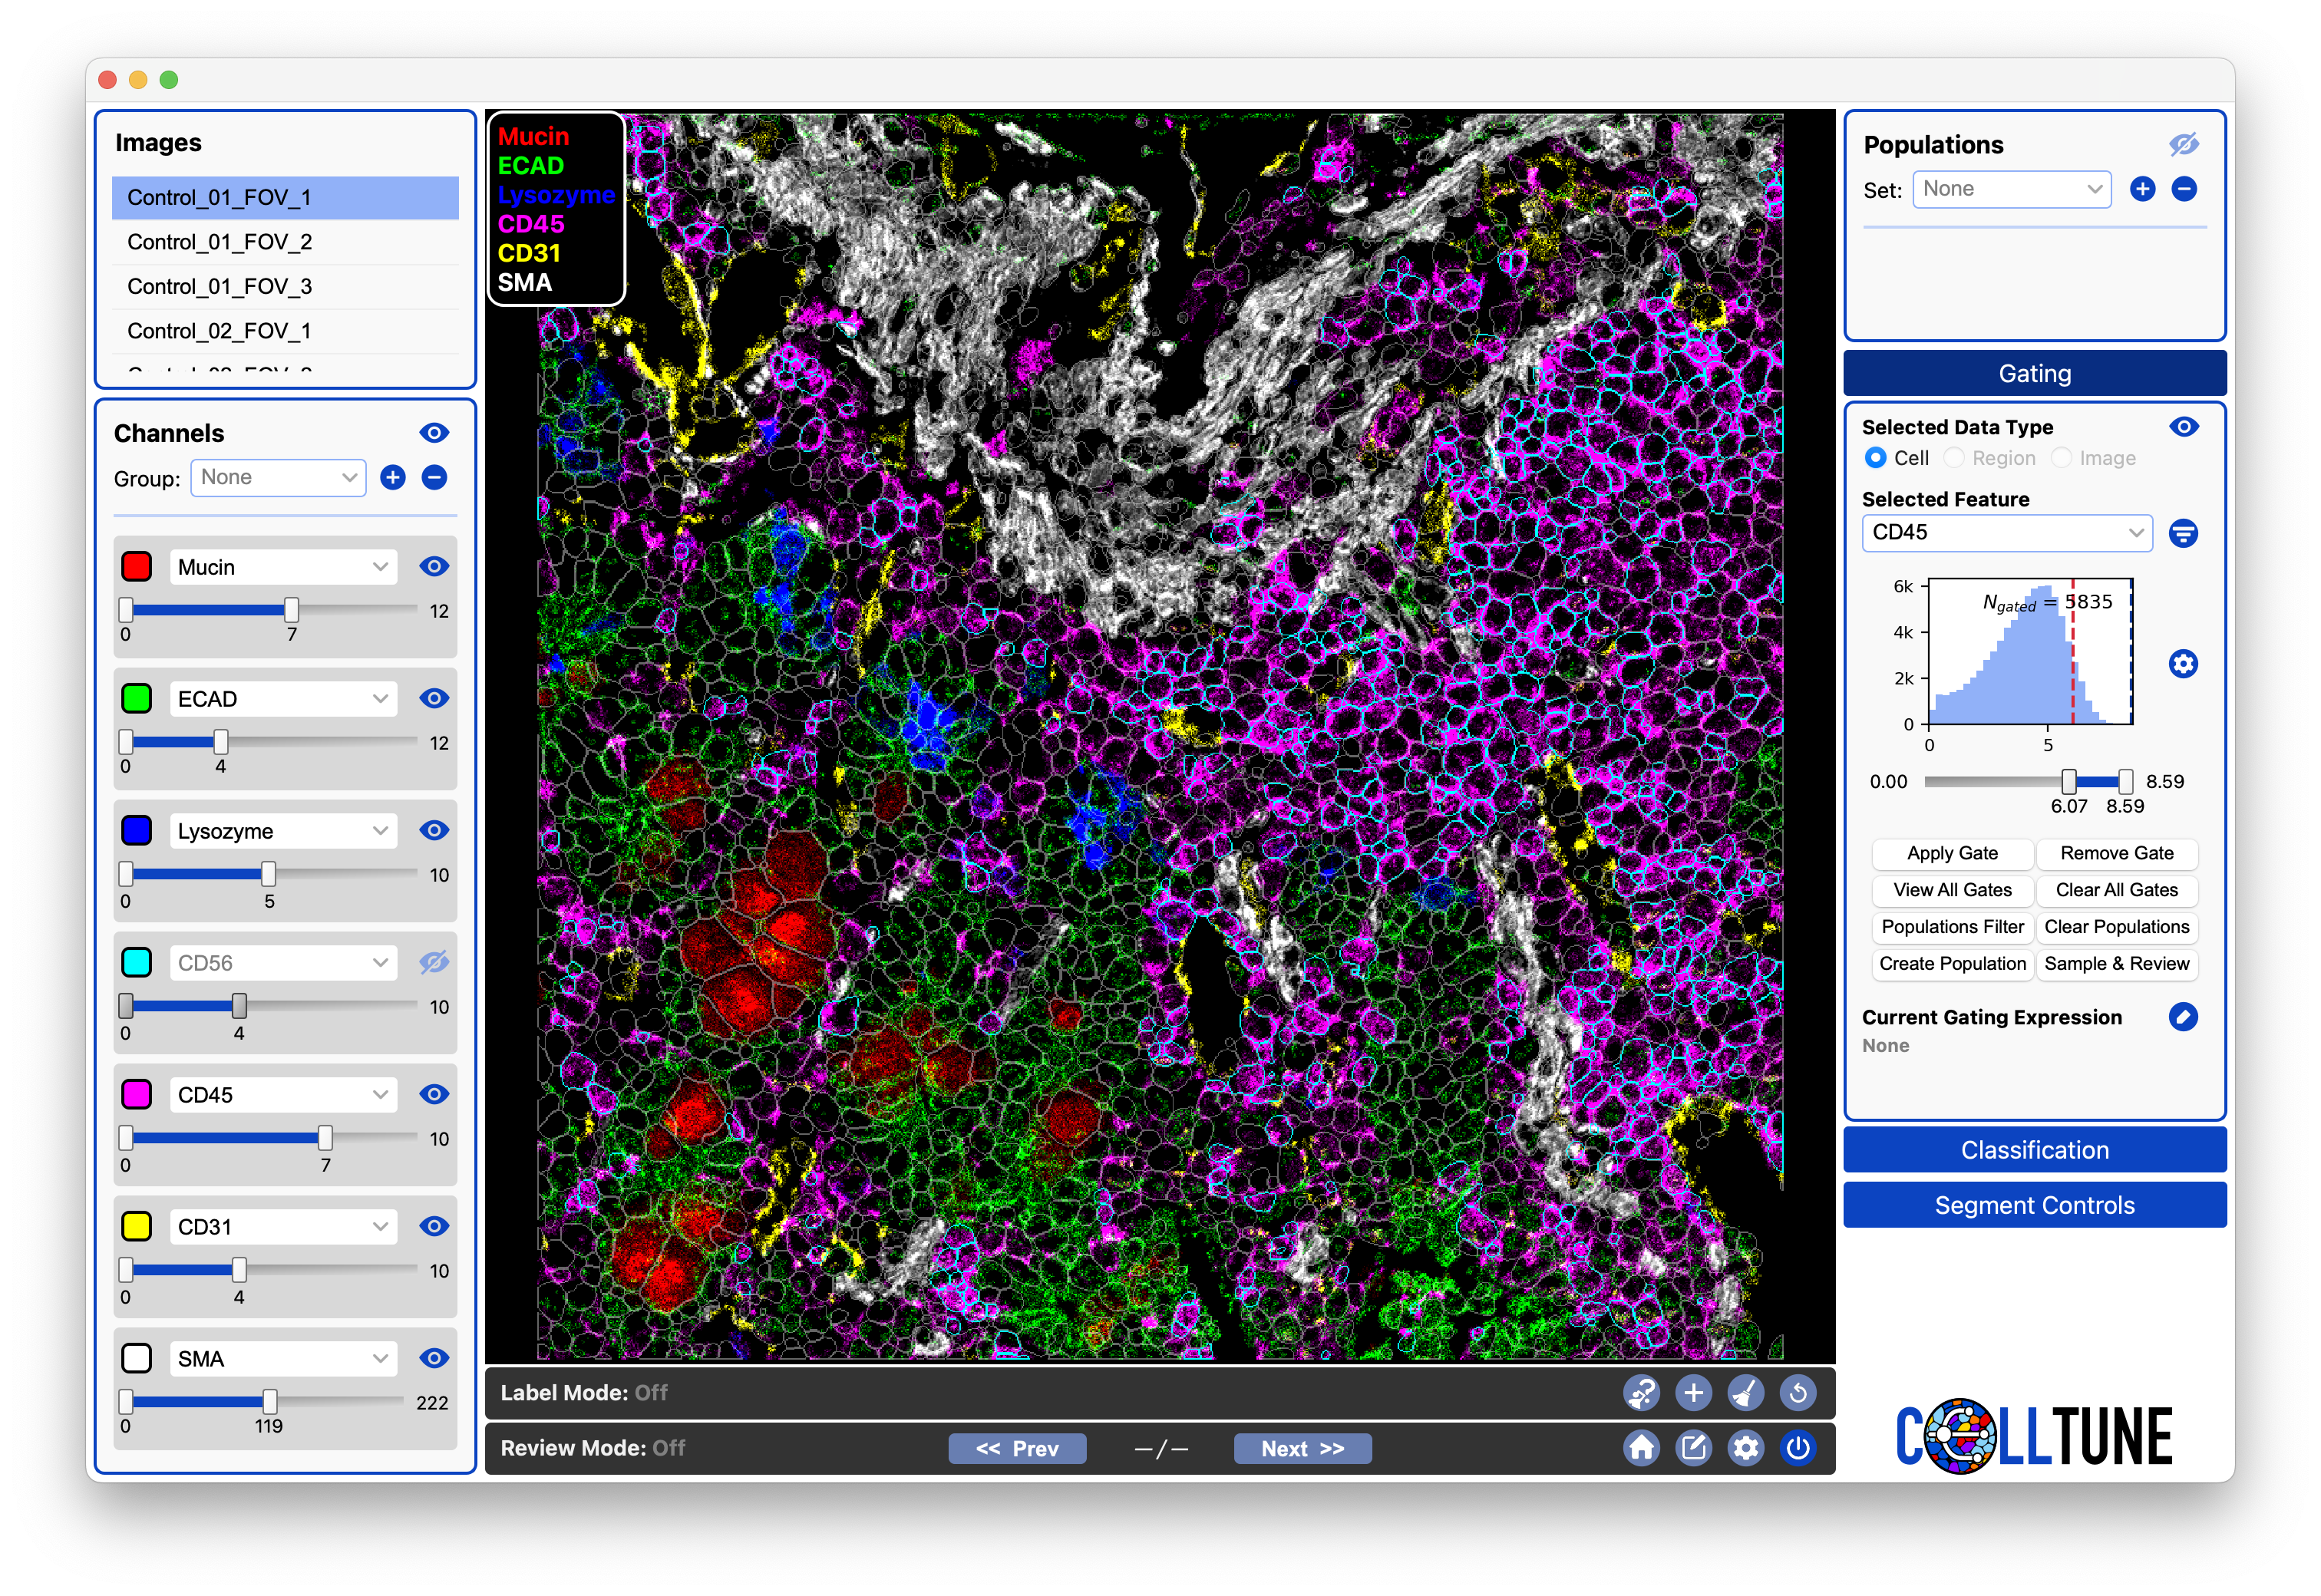
Notice where the threshold is now on our histogram
This concept is critical for understanding how we manually and automatically perform landmark gating.
Setting Multiple Consecutive Gates
As we apply additional gates, we can see that they are added to our gating expression at the bottom of the panel.

…

…

The colors are meaningless
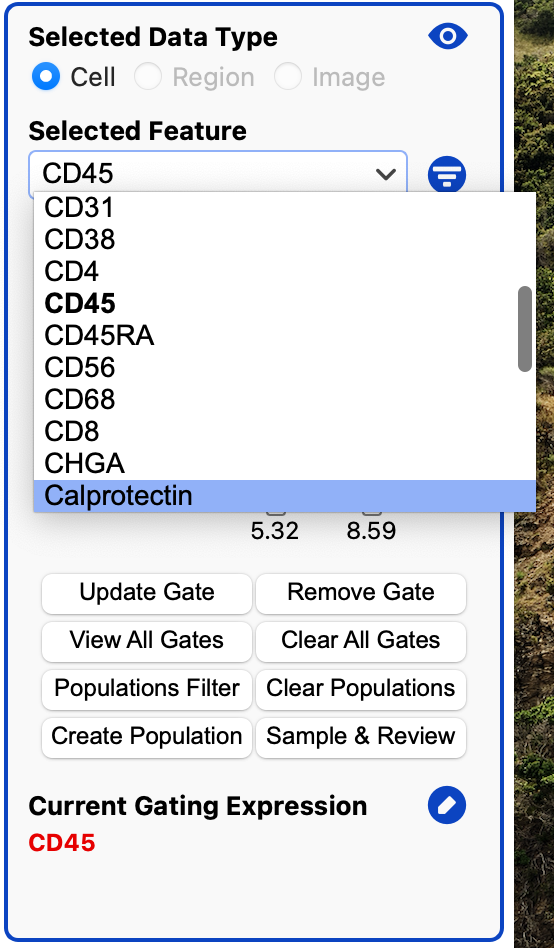
Already applied gates should appear bold in the gating feature dropdown:
Edit Gating Expression
By default the gating expression uses all AND (&) operators. We can edit it to use OR (|) and NOT(!)
[NOT is less commonly used - you can just equivalently set the threshold to be low if it was high before.]
Click on the edit icon next to the expression.

This will open a dialog where you can edit the current gating expression:

BE CAREFUL WITH PARENTHESES!!! You can delete parentheses if it makes it clearer for you to write.
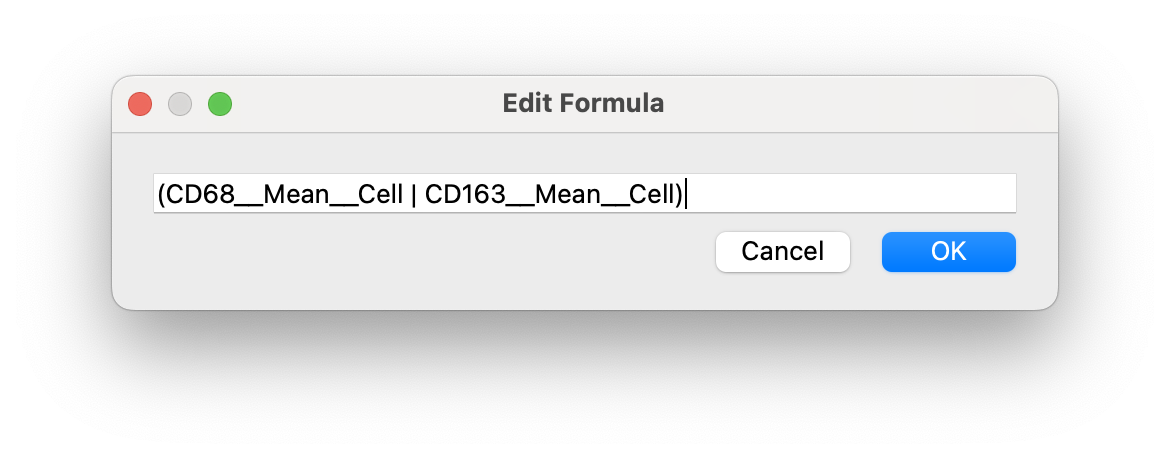
After editing, click OK and your expression will update:

Gating Populations Filter
Often we only want to gate a subset of a population. We can filter by any population or several populations in the current population set.
First, make sure you have exited Review Mode and no cell is selected (otherwise clicking on a population will label the cell). Then, click on a population or several populations (multi-select/deselect with Cmd, select a range with Shift, select all with Cmd + A)
Click on the Populations Filter and you will see the populations being used underneath the gating expression:
Only cells in the population will be gated by the features in the gating expression, as you can see here:
