Add Labels to a Classifier
Once you have created a classifier, you need to add labels to it.
-
In the classification pane, select your classifier from the list and click on
Add Labels.This will open the following dialog:
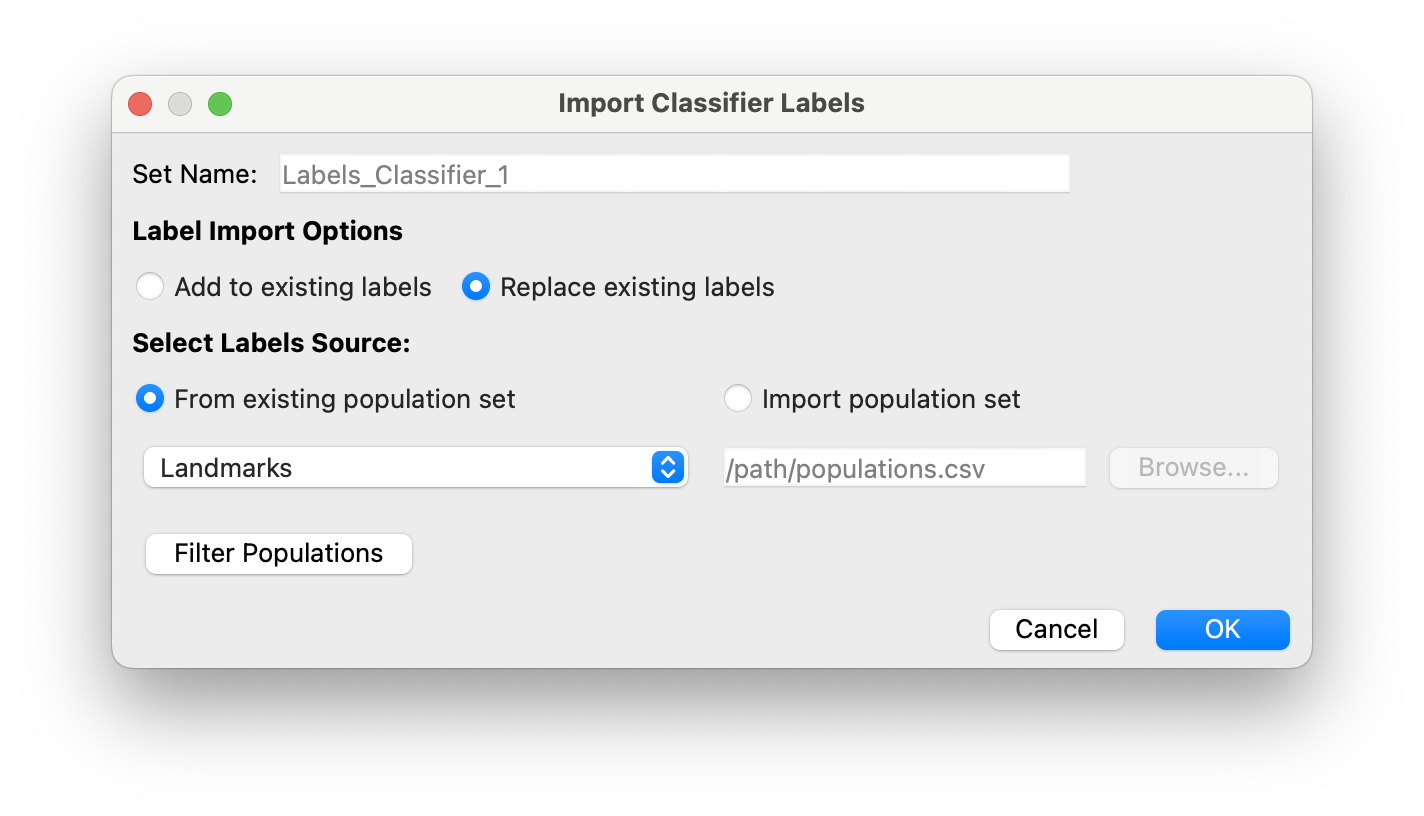
- The selected labels will be added as a new population set. You can edit the labels population name (Default = ‘Labels_{CLASSIFIER_NAME}’)
- In
Label Import Option: By default, if it’s the first time adding labels to the classifier, selectReplace existing labels. - In
Select Labels Sourceyou can choose between using labelsFrom existing population set, orImport population setfrom a path. For example, for the first labeling round you will select the landmarks as the classifier labels.- Click on
Filter Populationsif you don’t want to use all populations from the selected or imported population set.
- Click on
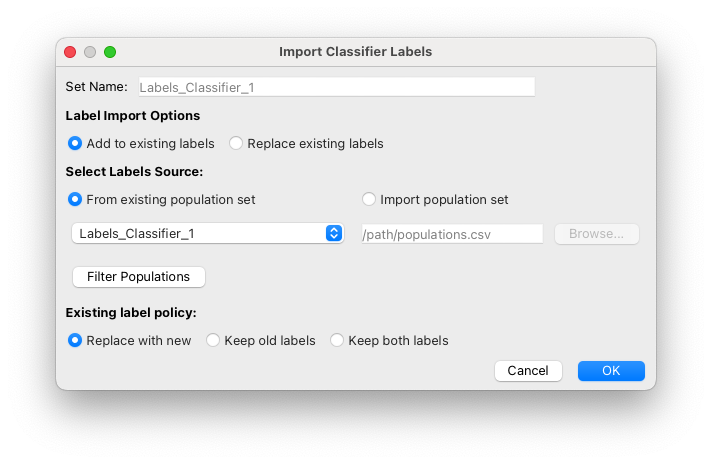
- If your classifier already has labels and you want to modify them, select
Replace existing labelsinLabel Import Options. This will open theExisting label policysection:Replace with new: If a cell from the new labels file exists in the current labels, replace its label with that of the new file.Keep old labels: If a cell from the new labels file exists in the current labels, keep its current label.Keep both labels: If a cell from the new labels file exists in the current labels, add the new label. In this case the cell will have 2 labels.
- Click
OKto add the labels to the classifier.